Bombers
| The role of level bombing, in Aces High, is designed to be enjoyable, practical, and captivating while still being representative of the real thing. Bombers best destroy by brute force, sweeping broad paths of destruction rather than bombing single objects with pinpoint accuracy. A successful bomb run requires a great deal of skill and planning.
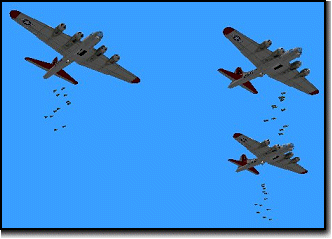
Formations When a formation is taken up, all planes in that formation count for kills and deaths. As the planes in the formation get killed, they count as a death for the pilot and as a kill for the attacker. If the lead plane is destroyed or the pilot bails out, the pilot is automatically put in control of the next plane which will then become the lead plane. This process will continue until there is only one plane left from the original formation. GunningGunning works similarly to gunning in a single bomber, but with more guns involved and convergence between the different gun positions being more of a factor. The pilot can man guns while a gunner is on board. Control of the guns is split between the pilot and gunner, therefore making them better able to handle multiple attackers. Gunners are able to join or exit from a plane at any time. This makes it easier to recruit a gunner for a short while when he's needed because he won't be trapped for the duration of the sortie. Pilots jump to the gun positions in the lead plane by using the default keys 2-7, depending on how many gun positions there are in that particular bomber. To move to a gun position, in another plane, in the formation, first jump to the desired position in the lead plane, then use the keys ctrl-1, ctrl-2, ctrl-3 or ctrl-4 to jump to that same position in a different plane. For example, to move to the third gun position of the second plane, first press 3 on the keyboard to move to the third position in the lead plane, then press ctrl-2 to jump to the second plane. The view will be changed to the third position of the second plane. The cockpit position (position 1) can only be jumped to in the lead plane. All gun positions have interrupter gear that prevents them from firing through any parts of their own plane. For example, the top turret of the B-17 will not fire directly backwards because the tail is in the way. BombingBomb runs have to be carefully planned and executed or they will be totally inaccurate drops. To execute a bomb run, the first step is to position the plane on the correct heading, flat and level, and with no acceleration or deceleration, and the second step is to calibrate the bombsite for the correct drop parameters. This system simulates the type of process a bombardier had to go through to set up a bomb run but handles the minutia automatically. There are four basic step to calibrating the bombsite:
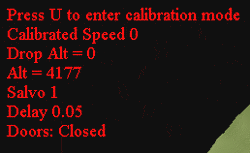
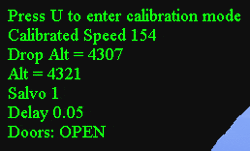
To calibrate the bombsite, the pilot must first jump to the bombardier's position. The default view in the bombardier's position is through the bombsite, although the pilot can still look around using the view keys. The upper left corner of the screen shows the current calibration status. Items that need to be set are displayed in red, items are displayed in yellow while in calibration mode, and all items are displayed in green when the bombsite is fully calibrated. |
| 1. Enter calibration mode | |
|---|---|

Upon entering the bombsite, the calibration status shows the current calibrated speed, drop altitude, plane altitude, the current salvo and delay settings and the bomb door status. "U" is the default key command to enter calibration mode, but if you have made changes to your key map at any time, you'll have to go into the key mapper and map this key before you'll be able to calibrate the bombsite. Press the key you have assigned or "U" to enter calibration mode. |
|
| 2. Set target altitude | |
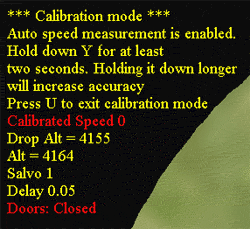
 Make sure your altitude is steady and your course will take you over the target. It is generally best to calibrate once you get close to the target. Make sure your altitude is steady and your course will take you over the target. It is generally best to calibrate once you get close to the target.
Press the 'Y' and hold it for at least 2 seconds. This will align and calibrate the site to the target altitude and your plane's current speed. Press 'U' when you are done. |
|
| 3. Exit calibration mode | |

After exiting calibration mode, the calibration status will be displayed in green, indicating that the bombsite is calibrated and ready to drop bombs. Remember that any changes to the flight profile (speed, altitude, etc.) between the calibration and drop will throw off the accuracy of the drop and the bombsite will need to be re-calibrated. |
Previous page: Arenas
Next page: Custom Skins
